Saturday, June 1, 2013

The Canadian Food Experience Project (or how I'm reactivating my food blog)

So I haven't posted here in almost a year. How do I know that? Because my last blog had something to do with butter tarts and the Tour de France, and the Tour is starting again in exactly 28 days from today (squee!!).

It's not that I haven't been cooking, or baking, or anything culinary for a year. I have. But I've also been trying to write offline. Recently I've been encouraged to go back, pick up the page, and make a concerted effort to make this writing thing a go. After all, I'm hitting my mid-life crisis (as you can tell if you've seen the sixteen colours in my hair these days, including but not limited to, grey) and if I don't do this now, well, it's never going to happen, and I might as well just go back into the ocean of commonality sludge with all the other dreams that die...

So I've been hanging out in the world of fiction. It's a fun place because you get to make stuff up (like hanging out with men who look like Alexander Skarsgard and Justin Theroux). But really, it's hard work. And I want people to read what I'm writing now. Plus, I want to write more about food. I love sharing my recipes, and I even love the feedback I get from people who've tried making the bacon & eggs cheesecake ("mine cracked. How did you get yours not to crack?" etc.).

This morning, I was sitting around, waiting for people to wake up, sipping my green tea, and checking my Twitter feed to see what nonsense had happened overnight when there was a very interesting tweet from @lucywaverman:


So I clicked on the link, and read about The Canadian Food Experience Project. And well, I'm Canadian. I like food. And I like writing about food. So I contacted Valerie, and now I've signed up!

This will now make sure you have at least one (1) new food blog entry each month. This coming entry (due on June 7th which is Friday as I write this - ack! deadlines!!) will be about My First Authentic Canadian Food Memory. Now given that I was born and raised here, and given that my parents are from Trinidad, this should be a very interesting memory. It may not be as luscious or organic as some of the other writers, but it will be Canadian, and it will be uniquely mine.

So stay tuned to this page... :)

Monday, July 2, 2012

Canadiana

Happy Canada Day!! July is my favourite month of the year. It starts off with Canada Day (a stat holiday) and then has the Tour de France (21 days of well-toned men in lycra), and we don't even need a coat!!

So for this Canada Day weekend, I thought I'd try making some Canadiana dish, in between writing the novel that no one will ever see and the blog that no one reads (not this one but this one). So I set out on the quest to make the most grandma of desserts, the humble butter tart.

Butter tarts (or tarte au sucre if you're from Quebec - Happy Belated St. Jean-Baptiste by the way) are a pure Canadian concoction. Well they appear to originate from Quebec, who are conveniently Canadian to the rest of us when they do something good (butter tarts, poutine, depanneurs, GSP, Schwartz's) and then are those friggin French whenever they do something the rest of the country finds off-putting (hockey riots, student riots, FLQ riots). Personally, my politics are for a Canada that includes Quebec just as it is, with its distinct society and its obscene taxes on gasoline (where you can also buy beer, unlike anywhere else in the country except for Alberta. In fact, Quebec and Alberta have a lot in common, but whatever you do, don't tell them that!).

And so, my Canada includes the humble butter tart. Some people like to put things into butter tarts, like nuts (nuts are not indigenous to Canada, so why?) or raisins (raisins are rabbit droppings from hell, so again, why?). I like my tarte au sucre as nature intended - plain, just a little runny, and sweet.

When I looked at the components of the butter tart, it's really just a pate sucree with a runny filling. Though really, the crust should be made with le Tenderflake (and I found out why in the process) instead of butter.

Pate Sucree
(from La Varenne)

1 2/3 cups (200g) soft flour (all-purpose will do in a pinch)
6 1/2 Tbsp (100g) cold, unsalted butter (does not have to be cubed) or Tenderflake lard (yes lard)
1/2 cup  (100g) caster or confectioners sugar (if caster - pate sucree; if confectioners - pate sablee)
4 egg yolks (cold)
1/2 tsp salt (I used 1/4 because I had sea salt)
1/2 tsp real (please) vanilla extract

Sift flour, sugar, and salt together onto a clean, smooth work surface. Make a well in the centre. Using your knuckles, pound the butter to soften it (a good stress reliever). Add the butter into the flour until it looks like cornmeal. Make another well and add the yolks and vanilla, bringing the whole thing together.

Using a pastry scraper, spatula, or knife, work the crumbs until you have large pieces that stick together. Press crumbs into a ball and knead with the heel of your hand until it comes together as one smooth piece of pastry. This will take a few minutes. Work out that stress. Once its smooth, form it into a ball and wrap it tightly in plastic wrap. Refrigerate for at least 30 min to overnight, remembering that it is butter/lard in there, so if you leave it for too long, you'll have to let it warm up a bit before rolling it.

When you're ready to make tarts, roll out the dough as you would for a large pie, until it's about 1/3-1/2 inch thick. Yes make them this thick! Then cut large circles, about an inch larger than your tart tin or muffin tin. If you're using muffin tins, for the love of God grease them, even if they're no stick. Because in the world of the butter tart, there is no such thing as "non-stick". They're butter tarts!!

Take your cut circle and form it around the muffin tin/tart tin, making sure that no holes form. If you tear the pastry, make sure you fix it, so that there is no way in hell your tart will leak from the bottom. (Trust me!) Once you've lined your tins, put them back in the fridge while you make your filling.

So while I was watching Stage 1 of the Tour de France today (now yesterday as I'm finishing this entry during Stage 2), I put together a pate sucree and chilled it, then rolled it out and thought, why am I going to make these in muffin tins? Why not be fancy about it and use my tart tins that I never use (again I found out why in the process)? So, I rolled my pate sucree tart thin, and lined my tart tins.

To make the filling, I used maple syrup instead of corn syrup. Why? Because it's Canada Day, that's why! And what the hell, corn syrup? Did you know that shit can power your car? Corn syrup scares me. Even more than raisins.

Maple Butter Tart Filling
1/4 cup unsalted butter, softened
1/4 cup packed brown sugar
1/2 tsp vanilla
1 whole egg
1/2 cup maple syrup

(yes that's it. I couldn't believe it, either.)

First, set your oven to 375F. Whatever Celsius. In Canada, we use metric for everything but cooking. Deal with it, Europeans!

The best way to mix this is by hand. I know...nobody has hand-creamed butter and sugar since 1972. But you have to for this. Or else it's a waste of electricity and it's just not right, eh? So, using a wooden spoon, cream butter and sugar together until it's smooth. Then add egg and vanilla and whisk until fluffy and even. Then stir (not whisk) in maple syrup until blended. Bits of butter will float to the top. That's ok. That's your tart cap.

Take your shells out of the fridge. Pour in the filling to about halfway up the tart. Don't go all the way up. Why? Because it's sugar, damnit. What does sugar do at high heat? It bubbles! So fill it 1/2 maybe 2/3 if you like to live dangerously. Fill as many as your mix allows (mine did 7). Then put them in the oven for about 12 minutes. Check. If they are leaking and flowing all over, cry. If they're not bubbling, leave them for another 4 - 7 minutes. When they bubble, give them a minute and then take them out. Pray to God they haven't leaked. If you are worried about leakage, make sure your tins are on a cookie sheet.

So here's how the good ones turned out, because, well, nobody ever posts pics of the disasters, do they?

That is, until now:


What happened? Well, they're butter tarts. The crust was made with butter. Butter melts in the heat. Butter also melts through butter. Ergo, leaks all over the place. Leaks which might have been contained had I used the muffin tins for the tarts as every self-respecting Canadian grandma will tell you.

But hell, they tasted amazing! So good they can only be described with bad grammar...

So enjoy the rest of your Canada Day weekend. Have a butter tart! And since all the stores are closed Monday, go for it and make your own. Spoon any leaked filling on top of chantilly cream or Canadiana ice cream by Chapman's. :)

Sunday, June 3, 2012

More Fun with Nutella

Is there any more polarizing food than Nutella? People either love it or hate it. But very rarely is anyone indifferent about it. Many cyclists consider it ambrosia. Many women consider it ambrosia. Many other people think it was created in the bowels of hell and should stay there.

I am a reformed Nutella consumer. I loved it as a child, hated it once my hormones kicked in, and now, in the twilight of my biological clock years, am starting to love it once again. (Maybe it's an estrogen thing...?) 

I've already made the aforementioned crack cookies (in my previous blog), which are still the best cookies I have ever made. I tried a stuffed Nutella cookie, and it was okay, but they weren't as "cracky".

Now, it's strawberry season. We're two weeks early this year, thanks to the summer conditions we had in and around the Greater Toronto Area in March and early April. In late April, we did have a frost, and some of our strawberry farmers struggled to keep their plants alive. But alive they stayed, and so I picked up the first sweet Ontario strawberries of the season  last weekend.

My son is currently in a strawberry phase. "I love strawberries because they are so healthy!" he says. Except when it comes to eating them. He likes looking at them, smelling them, but putting them in his mouth whole? Nope. Still won't do it.

So I was stuck with this quart of strawberries. I suppose I could have eaten them all, but that would be selfish of me (never mind I really don't feel up for a cleanse at the moment). And I was stuck for a breakfast idea. I was going to make strawberry muffins, but muffins last way too long in my house since, well, I don't eat them. My son will eat them the day they are made, but after that, they sit there. And my partner is off carbs at the moment. 

I made a batch of crack cookies yesterday, and stared at the Nutella jar on the counter this morning. What goes with strawberries better than chocolate? There had to be a recipe out there for strawberry Nutella something...sure, lots of recipes for Nutella pancakes with strawberries on top. But again, that doesn't solve the problem of my son's disdain for fruit looking like fruit.

So I made up my own recipe. And he ate it. And so did everyone else. So I'm sharing it with you, because really, if you're a Nutella junkie fan, it's only fair to share Nutella recipes with the world:

Strawberry Nutella Pancakes

Makes 7 large or 12 mid-small pancakes

1 cup plain flour (all-purpose or whole wheat or bread flour)
1 1/2 Tbsp sugar (white or brown)
1 1/2 - 2 tsp baking powder (depending on how fluffy you want your pancakes)
1/4 tsp salt

1 large egg
1 cup plain milk (not buttermilk or cream)
1/4 - 1/3 cup Nutella (to taste)
1 tsp vanilla
2 Tbsp melted unsalted butter, cooled
1 pint minimum but not more than 1 quart fresh strawberries, hulled, washed, and pureed

First things first - wash your strawberries. Don't buy a huller. Just use a paring knife and cut the green part off. These are being pureed, so there's no need to make them look fancy. Puree them in a chopper or food processor (or a mortar and pestle if you have the time, but most of us are busy trying to wake up children and/or make sure they don't kill themselves during unsupervised play time). Set aside.

Blend all the dry ingredients together in a large-ish bowl. Don't use a spoon. Use a whisk, pastry blender, or a fork. Make sure the baking powder is incorporated well into the flour. If you want, you can add a dash (1/4 tsp) of cinnamon or cardamom or both into the dry ingredients at this point. Set aside.

Mix all the wet ingredients, including the  Nutella and strawberries, into a medium bowl. For this, don't use a whisk. You can use a spoon or a fork, but if the Nutella is in globs, it's not a problem, really. Just make sure your eggs are a little scrambled into your milk, berries, and Nutella. 

Now, here's the secret to fluffy, yummy pancakes: Dump the wet into the dry. Stir, or better, fold in less than 10 times with a spoon (or whatever you used to mix the wet ingredients together), until most of the flour is barely blended in. Do not overmix. It doesn't have to be homogeneous. It just has to "meet" - dry, meet wet.  


Second secret to great pancakes - get a cast iron skillet. It can be used as a weapon, but it's the best thing ever for pancakes. It holds heat well, is thick enough to keep the fire off the bottom, and they come out oh-so fluffalicious! Use a ladle or large spoon to pour batter into the centre of the skillet for a pancake large enough to eat but small enough that you can handle easily. And watch. Soon you'll see little bubbles start to appear at the surface. Keep watching. The bubbles will burst and not close up. Keep watching. The edges will start to look dry and matte. There you go. Use your flipper, slide it under, and flip! Perfect pancake. Wait until the bottom looks as dry as the top of your edge, and then turn onto a plate. Or, if you're still not sure, stick them in a warm (185F) oven until you've finished your batch and are ready to serve.

I served these with whipped cream (like cream I whipped myself by hand, unsweetened. Not that stuff in a can. And good lord NOT cool whip!), and maple syrup, and for my stepdaughter, topped with whole tiny strawberries. 

Sorry I only have pics of the prep, but you'll see, they are a pretty colour. And if you have Nutella fiends in your house...they'll just ask for more!!


Thursday, February 2, 2012

Crack Cookies!!!

Last Sunday was a beautiful Wintring morning. Since we haven't really had Winter yet, except for a couple of days, and it was nice and warm like Spring, and it's after January first, I'm making up a new word and calling it Wintring.

I woke up early. The sun was shining. The birds were singing. The tank is clean...

Anyway, I had an urge to bake something with peanut butter. The child did not want muffins. He wanted eggs and sausage. So no peanut butter there.

I didn't want to make just any old peanut butter cookies. I wanted something different. So I went to my good friend Google, and Google led me to these. They are quite easy to make, and it's a good recipe. I substituted organic red fife flour for the whole wheat flour, which added an extra nutty taste, and organic peanut butter for that crap that they make with hydrogenated peanut oil and shitloads of icing sugar.

In the middle of rolling the cookies for the cookie sheets, my BBM went off. Normally I would have just waited until I was finished, but I was expecting some news during the weekend, and unfortunately, it was the sad news that we had anticipated. I had one batch in the oven, and a second batch on a second tray nearly ready to go. There was still some dough remaining in the mixing bowl, so I threw some plastic wrap over it and put the entire bowl in the fridge.

As I was on my way to the funeral, the sunny day that I had woken up to quickly became overcast, and as we drove to the gravesite after the service, the snow started falling in giant flakes. By the time we had buried the body (most people at the site performed the mitzvah of helping the family bury the body by shoveling dirt into the grave after the body is placed inside), we were standing in near whiteout conditions. The family's limo fishtailed as it left the cemetery, but they and the rest of us were okay. Since the storm was travelling eastward, I ended up driving all the way home in it. When I did get home, the one thing that helped settle me from the day's events was taking the remainder of the dough out of the fridge and rolling it up into cookies, pressing each one with a fork (as you do with peanut butter cookies).

I also noticed that, when I came back, the 18 cookies that had been baked had suddenly become 4. And the 18 I baked after that were consumed within 24 hours of leaving the oven.

So let me warn you know - these are comfort cookies that will bring you joy in your time of sorrow. They are also, simply put, highly addictive. Make sure you make a double batch, as I have to when I make them again this Saturday for UFC night. :)

Saturday, October 1, 2011

The Trifecta Cheesecake Weekend (Part 2)

So when I last left you, dear Reader, you were going to try the incredible bacon and eggs cheesecake . And I had promised you that I made my 40-something friend an even better one.

But how can you improve upon such sinful goodness? By adding on a couple more sins to the mix.


Notice the difference in colour? It brings out the bacon (there is actually more bacon in the other cake, but the colour of this cake enhances the bacon bits). What could give a cream-coloured cheesecake such a tan-like colour? Sun lamp?

Remember when I said my friend and her husband were Irish? Now, far be it for me to stereotype people. My partner is half Irish and my son has a full Irish name. But really, the only thing that could make a bacon and eggs cheesecake better is to add alcohol to it. And not just any alcohol, but that most famous of Irish liqueurs used in cheesecakes worldwide.

Bacon and Bailey's Cheesecake

Follow the directions for the bacon and eggs cheesecake, except you add 3/4 cup (yes THAT much) of Bailey's to the mix just after you mix the eggs in. To make it even more decadent, melt a 2 oz square of baking chocolate, and allow it to cool but not solidify. After you add the bacon, and pour it into the pan, pour the chocolate on top and use a knife to swirl it in for a marble effect. (Yes I am trying to get Wilford Brimley to visit your house).

Bake this cake for 45-60 min, again doing the jiggle test after 35 min. 

Normally, this size of cheesecake will serve about 6 - 8 people. But you will either refuse to share it or you will want to cut very small slices since it's so rich. If the latter, you're a better person than both my friend and I, who hid it away from the rest of her party. 


The Trifecta Cheesecake Weekend (Part 1)

Hello world! It's been quite a while since I've been here. I would apologize, but life just seems to get in the way of things. Except when it comes to two things - bacon and cheesecake.

Honestly, I am not the biggest cheesecake fan. I really find it a rather bland dessert. But, much like sweet cream ice cream, the humble plain New York or Philly-style cheesecake can be a base to lead you to somewhere beyond the dessert universe.

And yet, I have many friends who would walk over their mothers for a good cheesecake. And who wouldn't hesitate to sell out their country's innermost secrets for bacon...mmmm...bacon.

A while ago I made bacon and eggs ice cream. It sounded intriguing. And the Bacon Master of the house, my son, couldn't get enough of it, and neither could his bacon-loving male relatives.


So I made a promise to my bacon-loving friend. As he and his lovely wife were looking for a house this past March, I said that when they bought a house, my housewarming gift to them would be a bacon and eggs cheesecake.

Well, they bought a house. They moved in June. They scheduled their housewarming for August. (Note to self: schedule a housewarming for myself sometime before I move.) So I had to think of a bacon and eggs cheesecake recipe, since, if you google it, well, that's probably how you happened upon this blog.

Unfortunately, they scheduled their housewarming on the day of my friend's 40th birthday. She is Irish. Her husband is Irish. They had an unlimited bar. Dilemma.

I had already committed to make the bacon and eggs cheesecake, and my soon-to-be 40something friend liked the sound of that as well. But I still wasn't sure how this was going to work.

You see, the caf at work (and if anyone from work is reading this, please don't run from the cheesecake recipe) has a breakfast special every Monday of toasted bagel with bacon and cream cheese. And it is fan-fucking-tastic.   I have been eating that every Monday for 6 years, save the 6 months during my pregnancy where I had to forego bacon because it was a cured meat.

So if bacon and cream cheese worked, and bacon and eggs made wonderful ice cream, surely this cheesecake could not fail.


See for yourself. Here's the recipe:

Bacon and Eggs Cheesecake


6 strips applewood or maple-smoked bacon, thick or thin cut (not double smoked)

one dinner plateful of brown sugar (not golden - has to be brown and clumpy)

1 1/4 cups graham crumbs

1/4 c. melted unsalted butter

3 pkgs of cream cheese (full-fat - using half-fat is like having a Big Mac with a Diet Coke) (use Lactancia cream cheese if you can find it, since it's the best for baking)

3/4 c. white granulated sugar

3 eggs

1 tsp. vanilla extract

First things first - you need to make caramelized bacon. WARNING: this is like opening a crack lab in your house. It may sound repulsive, but once you try the end product, you will want to do nothing else for the rest of your days except make and eat caramelized (aka candied) bacon. You will yell at the oven to cook it faster. You will burn your tongue on melted sugar and bacon fat. You must summon all your willpower and ensure that you can make this without eating it.

To make caramelized bacon: preheat oven to 400 degrees F. Cover a regular-sized baking sheet with tin foil, and place a cooling rack on top of it. Take a piece of bacon and dip it in the brown sugar, packing on as much brown sugar onto the piece as will stay on it (don't worry, some always falls off). Place the piece on the rack, and continue until all 6 pieces are covered. Pack any leftover brown sugar onto the pieces as they sit on the rack.

Bake the pieces until the sugar has melted and the bacon is cooked, about 12 - 15 minutes, depending on thickness. Keep an eye out for burning sugar mixed with burning fat. You may have to change pans part way through, or open all the windows (and let your neighbours know what's going on? Never!). Once the bacon is done, take it out of the oven and let it cool completely until it is crispy and crackly (no pun intended). Put it aside.


Yes, you will have to put a big sign on it. Maybe hire some Vegan Security Guards to stand next to the plate while you make the rest of your cheesecake.

The cheesecake is quite simple. I posted a recipe earlier for my pumpkin cheesecake here , which you can use for the technique for the springform prep, the graham crust prep (though you will notice that I no longer add sugar to my graham crust. I find this enhances the flavour of the cheesecake more. Plus a little less sugar is a little longer that I keep Wilford Brimley out of my house), and the mixing of the cheesecake. 

While you're baking your graham crust, take your crack, er, caramelized bacon, and cut it into teeny tiny little bits. Use a chef's knife (the heavy blade that looks like a full triangle), pile about four pieces on top of each other, and cut them in 1/8" strips following the short side. Then, cut these pieces in half along the length of the bacon (so that you have teeny bacon squares). Try to get them as small as possible. You're going for the artificial bacon bit look, not the breakfast strip bacon look. 

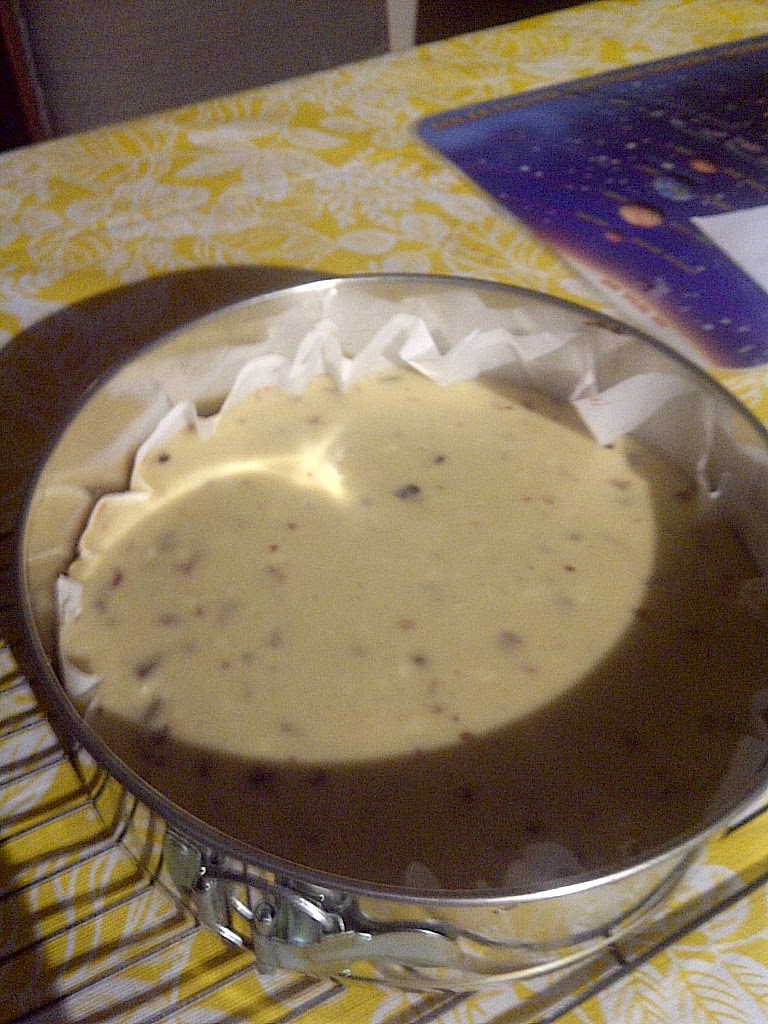
Following the cheesecake method for the pumpkin cheesecake (using all white sugar for our recipe here), mix all ingredients together, but instead of adding spices and pumpkin flesh, you add the bacon bits just before you pour the mix into the springforms. How much bacon? Add by the handful and keep your eye on the mix - you can't really put too much, but remember, it's supposed to be bacon AND eggs cheesecake. Stir the bits in gently, until they look evenly distributed. 

Bake following the pumpkin cheesecake method, but reduce the time to about 35 - 45 min. Check the cake after 30 min - jiggle it ever so slightly. If it runs like you just put it in, leave it for another 15 min. If it jiggles like cafeteria jello, then turn your oven off and leave the cake in with the oven door open until it can be removed without mitts. 

WARNING: Your cake WILL crack a bit around the bacon bit pieces, like this:


It's OK. If you've allowed it to cool in the oven, then the little cracks won't develop into big ones.

Let me know how you like this one. I thought it was so nice that I made it twice that weekend. Once for my friends and once for me. 

But what about your 40-something friend, you ask? Didn't you say this was a TRIFECTA cheesecake weekend? 

Well I made her something special. REALLY special!!....(to be continued).

Tuesday, September 6, 2011

The easiest and yummiest Angel Food Cake. Period.

Apparently I'm known for making cheesecakes. Don't get me wrong. I love making cheesecakes and I like to live dangerously by never, ever ever, never ever ever using a water bath. The crust never stays crusty with a water bath, no matter how many layers of tin foil you wrap the springform in. The cake never tastes done. I don't care if it's the "only way" or the "professional" way. I'd much rather bake it at a lower temperature right on the damn rack. And I've figured out a way to avoid the crack.

But we're not here to talk about cheesecake. I haven't blogged since the Fall about my culinary creations. Not that I haven't made any. I've just been busy with the holidays and obsessing about the weight I gained before and after the holidays to blog about all the food I've made.

At least once a month we have our friends over for a UFC Fight Night. My male companion usually BBQs, even in the depths of winter, and I usually make the accompaniments, including (and always) the dessert. It's usually cheesecake, but on occasion, I have made the most awesome Vanilla Bean Ice Cream and Strawberry Shortcake and other things which I should have probably blogged about (and I might later, and when I do, I'll put links in this blog to take you to those ones).

But last weekend, since we're all on the "let's try not to kill ourselves with saturated trans fats before we turn 50" diet, and because I don't want to be known as "The Cheesecake Lady Junior" (my mom being the Cheesecake Lady Senior in her heyday), I gave my guests a choice for dessert. Thankfully, the majority chose an Angel Food Cake. Thankfully because (a) for the aforementioned reasons and (b) I had about 24 frozen egg whites that were taking up precious room for homemade ice cream (I went through a bit of a hollandaise obsession over the holidays - perfected my  method, but many egg yolks sacrificed their never-to-be-a-baby-chick lives for the privilege of being poured over salmon and asparagus twice a week).

I searched high and low for a good Angel Food Cake technique (I know the recipe - egg whites, cake flour, sugar, and lots of freakin' air). Surprisingly, Rose Levy Berenbaum's book only had a Chocolate Angel Food Cake recipe. Since I found out one of my friends wasn't a big chocolate fan (the hard way after making double chocolate almond cheesecake for her anniversary), that was out. But I didn't want it to be just plain.

So I picked up a book I had always looked at but thought would be too hard for me to use: Regan Dailey's In The Sweet Kitchen. She had a lovely recipe for Poppyseed Angel Food Cake. Except after a rib dinner, the last thing people want to do for dessert is spend the entire time picking seeds out of their teeth. So I hemmed and hawed, and opened my spice cupboard to reveal: cinnamon (no, too strong), nutmeg (maybe, but a bit too savoury), cloves (WAY too strong), and cardamom. Cardamom, eh? Hmmm...


The picture says it all. I nearly forgot to take a picture for this blog, so it's the last piece left. Here's the entire recipe, with Regan Dailey's awesome mixing technique. I actually made a big mistake, but somehow it worked out. Once you try it, you'll never make an Angel Food Cake any other way again:

Cardamom Angel Food Cake

1 cup (unsifted) Cake & Pastry Flour (or just Cake Flour if you happen to have it). Do NOT use self-rising Cake & Pastry Flour. (why would you anyways?)

1 1/2 cups granulated or caster white sugar

1 tsp ground cardamom

1 1/2 liquid cups egg whites at ROOM temperature (you will NOT die)

2 Tbsp lukewarm water (tap is fine)

3/4 tsp cream of tartar

2 tsp vanilla extract

First things first - turn on your oven to 350 degrees F. Then clean your kitchen like you've never cleaned before. Make sure you can perform open heart surgery in the area where you will be making your cake.

Once your kitchen is clean, if you need to, separate your eggs (remember I took mine out of the freezer the night before and they were ready to be used by 11AM the next day. Yes THAT long!). Make sure that there is no speck of yolk, brown thingy, shell, or fetal chicken in your white, and for God's sake make sure you've used sterilized equipment for the whole process. (OK maybe not sterilized, as heated metal bowls may cook your egg whites, but make sure your mixing bowls are clean enough to use during your open heart surgery procedure.) If you don't know how to separate eggs, here's a trick I learned from a kid's cookbook: take a CLEAN teacup and saucer (like the fancy ones, yes.). Crack the egg onto the saucer, making sure the yolk stays whole and that no shell falls into the egg (use a piece of shell to take out other pieces of shell. It does work!). Then put the teacup over the yolk and tip the saucer over your clean bowl so the white falls out. When the white stops dripping, put the plate back on the counter, and voila - separated egg! 1 1/2 liquid cups of egg whites are about 10 - 12 egg whites. Make sure you leave them out to get to room temperature. If you stick your (clean) finger in the cup and you still feel a chill, wait. Trust me. Don't coddle them or use the microwave. Just wait. Go surf the web, update your Facebook status, have a couple glasses of wine, anything. Let nature take its course.

While you're waiting for your eggs to warm up, measure the flour, the cardamom, and all but 1/4 cup of the sugar into a sifter or large mesh strainer. Sift this mix three times. Yes, three times. Leave aside.

Take out your 10" aluminum tube pan, ungreased (don't use no-stick, you don't need to, but if you do, please turn down the temperature 25 degrees F), and keep it handy. Also, grab an empty wine bottle and make sure it is empty by overturning it in the sink to get the last drops out. Do NOT use a champagne bottle. Do NOT use a full bottle. It has to be empty. If you don't drink, then get yourself one of those empty bottles from Ikea. If you are waiting for your egg whites to warm up, then drive over to Ikea, buy a bottle out of the Marketplace, and come home. Your eggs should be warm by the time you get back (because nobody lives next door to Ikea. Nobody.).

Set up your stand or hand mixer and make sure the bowl is clean. Put your egg whites in the bowl, and put your mixer on HIGH/10/ultimate speed. When you start to see foam add the 2 Tbsp of water, and then put it back on HIGH until it turns to soft peaks (about 30 seconds in a stand mixer). Add the cream of tartar and then beat the mixture on HIGH again for another 20 seconds, then add the 1/4 cup of sugar. Beat until the egg whites are almost cardboard stiff (hard peaks).

Now here comes the fun part. Go wash your hands and dry them with a clean towel. Make sure you use warmish water. Remove the egg whites from the stand and sprinkle 1/4 of the flour mixture over the egg whites. Stick your hand in (DO IT) and gently but quickly fold the flour into the whites. It feels like you're folding a cloud. When you don't feel any more lumps, add the next 1/4 of flour, and continue by 1/4s until all the flour's been mixed in. If you're gentle enough, you will hardly deflate the whites. NOW use your hand to put the batter into the cake pan. Works way better than a rubber scraper.

Once you have scraped all the batter out of the bowl and into the pan, and off of your hands and into the pan, gently swirl a butter knife in the batter to get out any air pockets. DO NOT BANG THE PAN TO GET RID OF AIR BUBBLES. This ain't a pound cake or a cheesecake. You bang an angel food cake and it will fall faster than an anvil on the coyote's head.

Rinse your hands quickly and put the pan in the middle of the oven. Set your timer for 40 - 45 min, and leave the kitchen for at least 30 of those. Don't let anyone else in the kitchen. No dogs, no cats, no running children, no teenagers or spouses foraging for snacks. Don't run your dishwasher. Don't clean up yet. Just. Leave. Why? Because any slight and sudden vibration will MAKE THE CAKE FALL. You may think you're being gentle and quiet by washing the dishes, but unless your sink is at least 20 feet away from your oven, then just wait. Barracade the kitchen. If people go in, don't yell at them, just gently guide them out. Yelling can also make the cake fall (bad karma, loud noise). Think of the cake as a newborn baby that has cried for 72 hours straight and then finally fell asleep.

After 30 minutes, go turn on your oven light and take a look. The cake should have doubled in size and started to crack on the top a bit. It might even be browning. But DON'T OPEN THE DOOR. Tiptoe away from the oven for at least another 10 minutes.

Come back after those 10 minutes are up. If the top is golden brown and lovely, take a toothpick in one hand and, very carefully, open the door. If your kitchen is near a door or window that leads outside and it's winter when you make this cake, make sure that nobody opens the goddamn door while you do this. Firstly, lightly touch the top of the cake. If it springs back, just for insurance sake, stick the toothpick in and make sure it comes out clean. If it does, you're done. If the cake does NOT spring back, wait another 5 minutes and try again until it does.

Now here's the tricky part. Take your empty bottle and put it near the stove. Take the cake pan out of the oven. Tilt it on its side and stick the bottle in the hole in the tube pan. Invert the cake onto the bottle (it will hold) and leave it to cool upside down until the cake is room temperature.

Now you're looking at this page and saying, "Shit. I don't have a bottle. I forgot to get one, or I'm still drinking my wine." Well, you can use a colander. But it's not as much fun and it may take longer to cool your cake. Plus it won't freak people out the way a cake pan on a bottle does.

While the cake is cooling, make sure that nobody OPENS THE OUTSIDE DOOR OR WINDOWS. A draft will demolish all your hard work in the blink of an eye. If it's summer, you might be OK, but then you risk bees, flies, and other woodland creatures coming in and stealing your cake off the counter.

While your cake is cooling, you can make icing if you want. I used a whipped cream icing. Clean up all the stuff you used to make your cake, rinsing with very cold water. Fix the bowl and whisk attachment back onto your stand mixer. Take 2 cups of very cold whipping cream (35% cream) and pour it into the bowl. Add 2 Tbsp white sugar and 1 tsp of vanilla (if you want). Put it on HIGH/10 again. Watch it go. When it's just a little less firmer than the egg whites, stop the machine and put the bowl into the fridge until you're ready to ice your cake.

Once you can touch your cake pan with your bare hands and there is no warmth whatsoever (so about an hour), take it off the bottle. Take a sharp, thin knife (I use a boning knife - yes I know butchers and chefs. Get over it.) and run it along the side of the pan, and along the tube in the middle (between the tube and the cake). Turn the pan over, above a plate, and push down on the springform bottom. (Your tube pan isn't springform? Then you used a Bundt pan. You can still take it out, but you'll have to hit it very hard or get a scraper into the bowels of the pan to push the cake out.) Once the cake falls out onto the plate, run the same knife between the bottom of the tube and the cake. Lift up the bottom. There's your masterpiece! It should have about tripled in size.

If you have any problems with the cake, send me an email and let me know. If you have any successes, let me know too. Especially let me know your best techniques for chasing people quietly out of the kitchen while the cake was baking, because I could use some of those...